Creating high quality product photos is not such a simple process. Anyone who undertakes to take product photos intended for e-commerce will have to learn how to style the products, how to adjust the lighting, how to apply different exposures, how to present the products attractively.
The path to the valuable shot of the product photographer can be long or short. It all depends on the approach he chooses to improve the quality and efficiency of his work.
In this regard, it is important to understand that someone may study literature and technology in detail for years and not succeed, while another may not know every technical detail very well, but may have understood exactly what is needed and which ones. are the main steps to go through to make the most valuable shot.
Therefore, before you receive the first applause, you will need to cultivate and hone your skills by following a few basic steps in product photography.
Basic steps in product photography
Step 1: Identify the product niche.
The first and perhaps cardinal step for a product photographer is to decide what to shoot. When there are clearly defined goals, it is necessary to gather information by studying the target audience and its expectations for specific products. To identify essential and specific requirements regarding the presentation of the product.
To receive detailed information on where the images will be positioned and last but not least to consider the competition in the respective niche. In order to be able to stand out, especially when it comes to brand identification, a detailed study of competitors is an important part of future success.
Step 2: Planning
As a product photographer, you take responsibility for the message that the product will carry. The product shots you make must have the ability to model customer perceptions. That’s why you’ll need to find a way to highlight the product. To create the desired identity and attractiveness you need to plan the concept, to provide the necessary tools, to organize the way to realize your overall plan.
Step 3: Provide the necessary equipment
For the physical realization of a frame there is no way and you can not miss the equipment. Keep in mind that the equipment will not make the shot, but it will allow you to achieve higher quality. The right tools are always key.
What you will need:
- Camera (camera, smart phone)
- Lens (s)
- Tripod
- Comfortable place / table
- Remote trigger
In the world of product photography, you can find cameras and lenses designed to capture specific products. With them the results are better and the implementation work is much easier.
Lenses with a focal length of 50 mm, with a fixed aperture (f / 1.2, f / 1.4, f / 1.8) or in the range of 24-70 mm, 24-105 mm are always preferable in product photography. The presence of different lenses ensures adaptation to the challenges.
Of the cameras, full-frame ones are preferable, but if you are just starting out, you can start with a lower class.
The remote is useful for clear shutter release It will definitely save you defocused shots and will certainly reduce the time if you do multiple exposures from the same angle.
Step 4: Apply appropriate lighting
Lighting settings are a key step in the whole process. Depending on the product and the scene, you will have to choose the type of lighting – natural light and artificial lighting.
To create a mood in the images, through lighting effects, professionals often combine natural light and artificial lighting. But because the natural is variable and difficult to reproduce, often for successful product photography, controlled lighting is the better alternative.
It is important to pay attention to the shadows and highlights that the subject may reproduce. Consider using a softbox This type of light modifier creates soft, diffused light that reduces harsh shadows. In case you are shooting smaller products or jewelry for your convenience, you can get a tent for product photography, which provides even lighting of the objects.
Keep in mind that mastering lighting control is a priority skill for any product photographer.
Step 5: Product frame settings
You will need some color to make the rest of the photo. Each texture, fabric, color creates a specific feeling, speaks with its meaning or with its spectrum. The choice and their correct combination puts specific accents and is a guarantee for an emotional effect.
Therefore, determine the background in such a way that the product stands out. Limit distraction, by choosing the right objects to move the frame with.
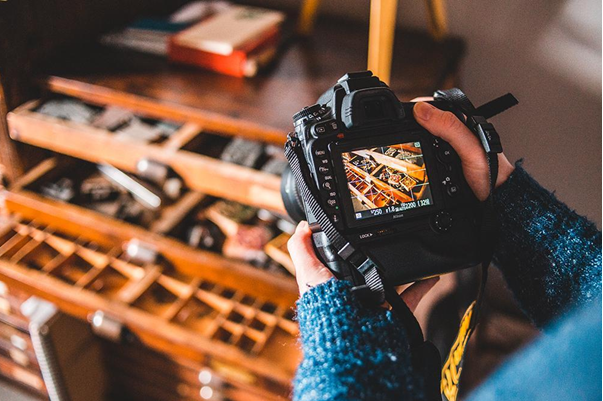
Photo: Freepik
Step 6: Capture the product
To be attracted and persuaded to buy, customers always need as many shots as possible, specific product presentation angles and detail.
How to breathe life into your products?
Before you decide in what position you will place your object and from what angles it will look most attractive, you need to be aware of the story it will tell.
In case the products will be positioned in an online platform, requiring a white background, there is no history. The most detailed shots presenting the product from several angles, accentuating specific details or a direct 360-degree view will be important for the viewer.
If you are going to present the products in the context in which they will be used, it is crucial to link the story to the application of the product itself. Each product frame in the context should give the user a clear idea of how the product will actually identify with it mu. To answer the question “Why buy this particular product?”
Well-thought-out backgrounds, angles and props are essential.
Lifestyle images tell the best stories of the products. Exactly such shots bind the product to the consumer and it is important what the first impression will be.
The dominant condition is that the product looks natural and is the star in each frame.
Take your time. For some subjects, you will need to do multiple exposures in the same frame, to emphasize different details or parts of the product by choosing the best possible light. Consider the composition. Everything in the frame must be symmetrically distributed. Do not forget about the rule of thirds and, of course, the perfect focus.
Step 7: Edit product images
After careful planning and precise execution, editing follows.
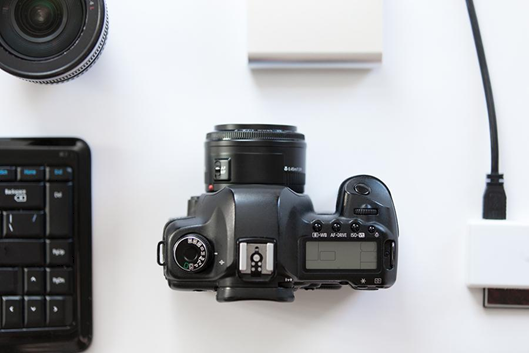
Photo: Freepik
All product images undergo some kind of processing for improvement. Whether they will only be resized, whether the color saturation, exposure, white balance will be adjusted or whether the background of the frame will be completely changed, the photos will undergo post-processing in a software editor.
Knowing the appropriate processing software is a basic step in product photography and it is useful for the product photographer to be able to edit his photos himself. This has a huge impact on his overall technique and style, because he has the opportunity to determine from the very beginning, what he would be able to correct in post-processing and what not. Having an idea of possible adjustments, this will certainly give him direction in the whole process of building and improving the strategy.
Following the sequence and going through each basic step in product photography is really essential if you want to be able to achieve balance in your frame and breathe life into the product in front of you.
Remember to provoke your imagination and leave your mark. This will set you apart. And always be ready for the valuable shot.