For online stores today, it is especially important to constantly develop, to become better and more attractive in the presentation of their range. A very sensible move on the part of brands and retailers present in the online markets is to follow the trends in product photography, in order to maintain and expand their positions.
Why is product photography so important for online stores?
When consumers visit an online store, their primary reaction is to view product images. This is the key point. A product page with high quality and sufficiently informative images shows the importance of the products and impacts on potential sales.
If you have decided to deal with product images in your online store, to expand its scope or online presence, it is enough to follow some basic guidelines in product photography that will help you get valuable online presentation, to be up to date and much easier to attract attention.
How do you take photos of your products to bring your product pages forward?
Here are some helpful product photography tips for an online store that can help you stand out:
- Tip 1: Choose from the best product types of photos needed for a successful presentation of the products in the online store
When building your product photography strategy, it is very important to determine what type of images you will need, to build the best possible visual presentation and to link the most important shooting and editing requirements associated with it.
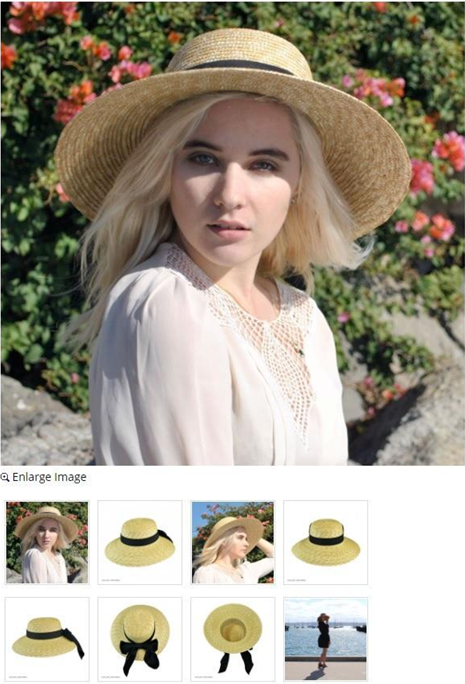
Photo: https://www.villagehatshop.com
- Tip 2: Choose the right light and settings for your lighting
High-quality product shots are the result of precise judgment about the choice of lighting and the appropriate settings. Once you have a clear idea of how to present the products, it will not be difficult for you to assess the effectiveness of lighting.
What do we mean? If you are going to take photos on a white background, you will need studio, controlled lighting.
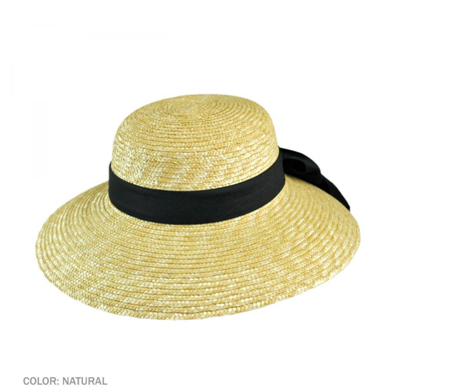
Photo: https://www.villagehatshop.com
If most shots will link the product to its application – context shots or lifestyle, natural lighting or a combination of both (studio and natural light) would be more appropriate.

Photo: https://www.villagehatshop.com
Natural lighting works well for product shots with food, people and for photos that will present you on social media or blog posts.
- Tip 3: Choose different shooting angles
The luxury of product photography is that you have the opportunity to take a few shots and then choose the ones that will most fully and valuablely show your products. Each corner reveals the object from a different position and emphasizes individual features of it. Unusual angles can be intriguing.
The more different positions and angles you have, the greater the chance to increase interest and meet the expectations of potential users.

Photo: https://www.villagehatshop.com
- Tip 4: Choose suitable detailed shots
Be sure to reveal all those fine points of the product that will provide an additional idea of its benefits.
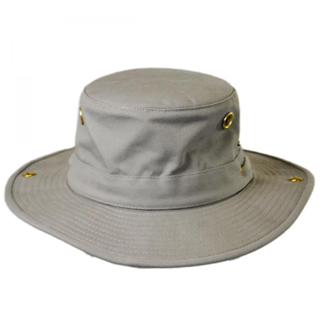
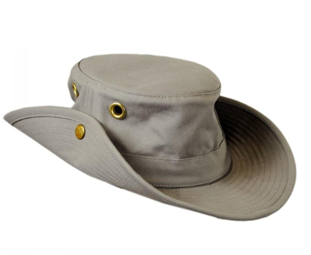 Photo: https://www.villagehatshop.com
One of the options for detailed shooting is to use the macro mode of your camera. The symbol for “macro” is a small flower (tulip). Macro mode is great for close-ups, allowing detailed focusing from short distances with incredible detail.
If you are going to act like a professional, add a macro lens to your equipment. Options are for lenses with shorter focal lengths, such as 50mm or 60mm, that will keep you close to the subject. Or the more popular ones with a focal length between 90 – 105 mm, which will make you feel more flexible.
An important condition for detailed shots is to control the focus manually, because the autofocus is not fast enough to deal with the flicker caused by a 1: 1 magnification of macro lenses. Manual aperture, shutter speed and ISO give you control over exposure. To achieve a pleasantly blurred background and sharpness in the subject, the focus must be shallow. Ideal for this purpose is bright optics (f / 1.4, f / 2, f / 2.8).
Forget about digital zoom. It will only degrade the image quality.
- Tip 5: Choose a suitable composition
In order to achieve optimal results with your product images in an online store, you will need to pay significant attention to the composition.
In the rule of thirds, you place the focus of the product optimally at the point where two lines intersect. This is where the gaze falls naturally.
The frames with empty space, to which you can later add text, will be useful for you in case of possible promotions and will give you the opportunity to combine them with posts on social networks. To add extra interest, use an odd number of objects and arrange them symmetrically.
- Tip 6: Avoid using filters
To generate quality product images, an important condition is the products look as natural as possible. Sometimes some nuances or the quality of the colors of the image can negatively affect the customer’s choice.
Therefore the use of additional filters is not preferable.
- Step 7: Resize and proportions
To get really valuable shots in product photography, we usually choose the highest resolution and largest file size that our camera allows. And real professional photos are usually in RAW format. But in fact these files are not suitable for an online store.
The loading time of product pages is important. Images need to be resized, but at the same time retain their quality, to be crystal clear for all mobile devices on which they will be displayed.
Customers, for their part, prefer to be able to view details and details. For this reason, your images must be scalable.
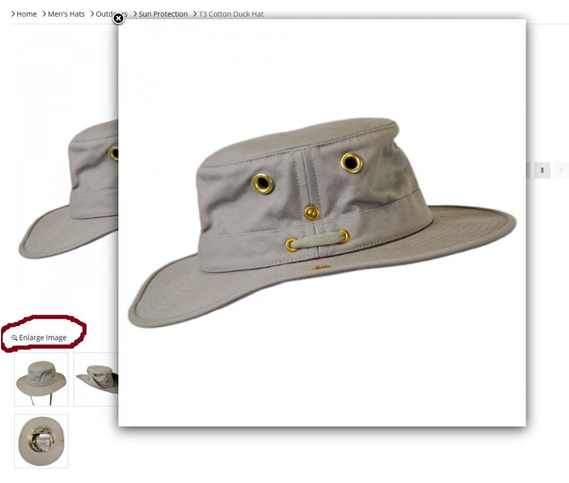
Photo: https://www.villagehatshop.com
Proper sizing, however, often proves to be a challenge.
What size should the images be?
Image size of 1024 by 1024 pixels would be sufficient. The frames do not have to be square, but it is recommended that they be permanently shaped. If you still want to have larger product images, try not to exceed 2048 by 2048 pixels.
Compression with quality preservation can be done with any of the following optimizers (ImageOptim, JPEGmini, Kraken.io, jpeg.io) or with editing programs.
If you use Photoshop, for example, you can develop a template that will maintain the consistency of product images, and you will certainly be able to resize much faster.
It is advisable to save the images in appropriate formats, depending on where they will be positioned:
- JPG (. Jpg / .jpeg), suitable for large frames, larger photos, and illustrations
- PNG (.png) if you need the background in the image to remain transparent.
- WebP can replace JPEG and PNG. Definitely the quality will be high and the files will be smaller.
- Photos can also be saved as TIFF (. Tif / .tiff), GIF (.gif), or BMP (.bmp) files.
With the right product photos, which are consistent, convey the right visual message, attract and increase user presence, you can also expect reliable sales results.
Of course, if your product is interesting, colorful, symmetrical better to occupy a central place in the product frame.
