If you are a creative person, an entrepreneur who develops an e-commerce site, a blogger, or you have a profile in Etsy, and you are going to actively present your brand in social media, or you are full with ideas and you want to diversify your activity, then it is time to dive into an exciting and beneficial adventure called product photography.
Mastering product photography requires desire, equipment, some talent and a few tricks.
List of the most important points:
- Use of a suitable camera and lens
- Approach to the choice of light
- Correct settings of the aperture, shutter speed, light-sensitivity (ISO) and white balance (WB)
- Creativity in the selection of background and colors
- Experimenting with compositions and photoraphing form the right angles
- Inclusion of additional elements
Above all, however, you must have a clear idea. Think in details and plan, and only then start the execution.
Whether you will photograph your products outdoors or indoors, one of the secrets of quality and beautiful photos is the light.
You have to choose between natural or controlled light (studio lighting). By choosing the right lighting, you highlight the product for a stronger impact. If you do not have the opportunity to hire a professional photographer and you have to take the photos by yourself, keep in mind that you will need photographic equipment that includes – additional flashes or lights, reflectors to direct the light and to control the shadows.
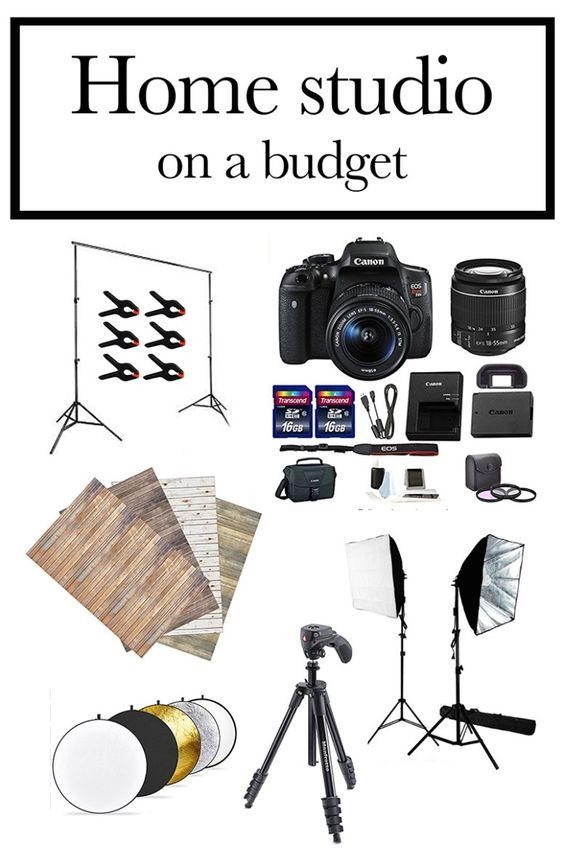
Photo: http://www.jennadesigns.net
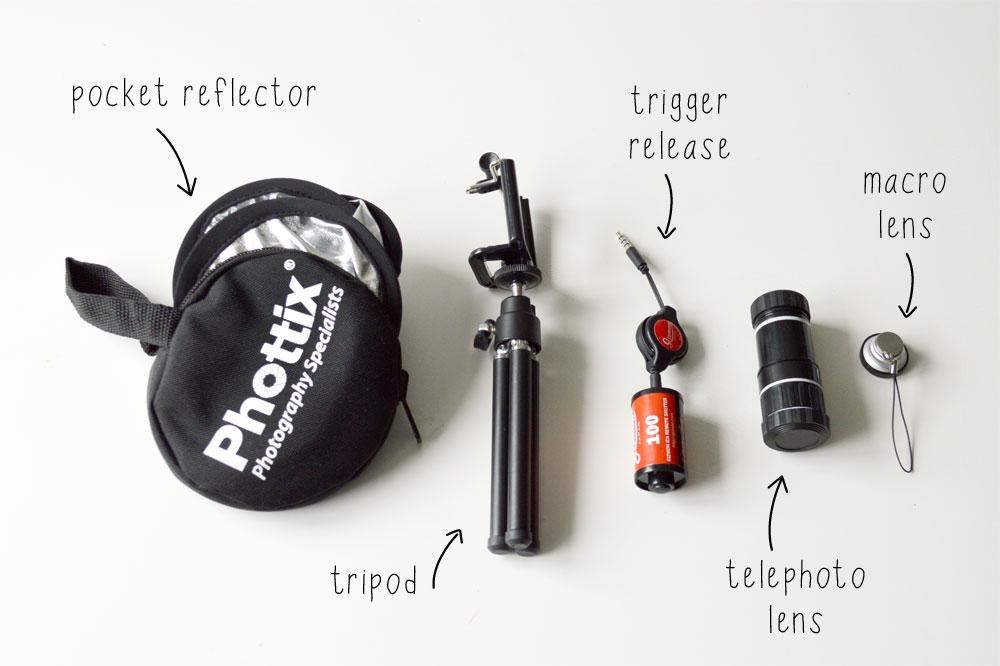
Photo http://mollymoocrafts.com/
The advantage is that you can also use things you already have. For example, lamps instead of projector. You can also make the photos close to the window. Scattered sunlight is a plus. Thus you will avoid gleams, reflections and unwanted shadows. You can replace the reflector with an aluminum foil or other suitable material. It is enough to be a little more creative.
A good choice for personalization of the lighting is a tent for product photography (a lightbox). It will be useful to you as a diffuser that distributes the light evenly around the product.
A regular white cardboard does a great work for a white background.
Typically, the distribution of light sources is as follows:
The key light must be placed in front and two additional lights should be placed on both sides. Test the angles and the distance of the lights until you get soft, evenly distributed shadows.
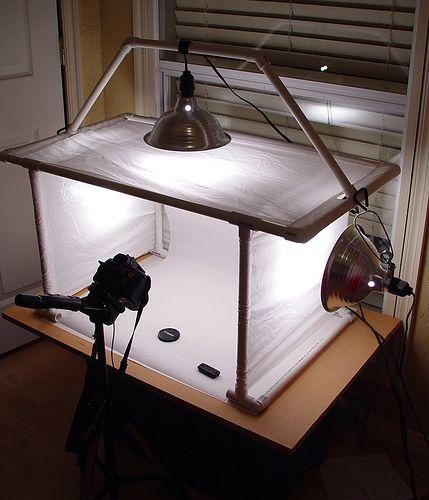
Photo:
https://www.flickr.com/photos/ainsworthphoto/287875597/in/faves-thosford/
Another particular detail is that lighting must also be in line with the specific composition of the frame (positioning of the product). The item must be visible and well exposed. It is important to note that when photographing the product on a white background, it should occupy 85% of the space. Whether additional arrangements or models will be used, the product must remain visible even when it does not fall into the main focus.
The ability to present the product in details, from different angles is key to the success among the customers. The skill to make such photos is an advantage.
Main photographing angles
Photographing on the level of the eyes.
Photographing the product from a high angle – from above
Photographing the product from a lower angle – the photo is made from below
Photographing from a bird’s eye – directly from above
Photographing with inclined angle to create a sense of movement.
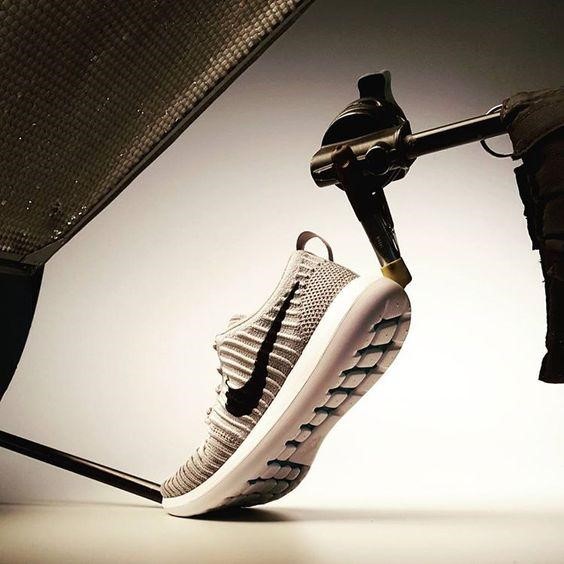
Photo: http://www.instagram.com
Of course, only the good composition of the product is never enough. Try to provide a variety and sense when choosing the background and colors. It is an advantage to know the colors and to be able to combine them.
The white background is preferable. It is mainly used in online commerce and stock photography. If you select the neutral background, you will highlight the brightness of the product.
By connecting the product with the background, you have the potential to create a seductive look of the product. To make an association that awakens the imagination.
Still, make experiments. The experiment is often a way to achieve great results.
With the advancement of the digital technologies, we can boldly say that we can use our smartphones t photograph products, not only the well – known DSLR cameras. We need to set the correct settings for lighting and background.
The resolution of the photos is an essential criterion for quality product photography, but that does not mean we need to have an extremely new of expensive camera. A camera within 14 MP – 20 MP is enough. Above this range, a DSLR camera is used for pictures intended for billboard.
There are plenty of good smartphones on the market with the right features and characteristics. Brands such as iPhone, Samsung, Xiaomi offer great models with a range of accessories that would do more than just great work.
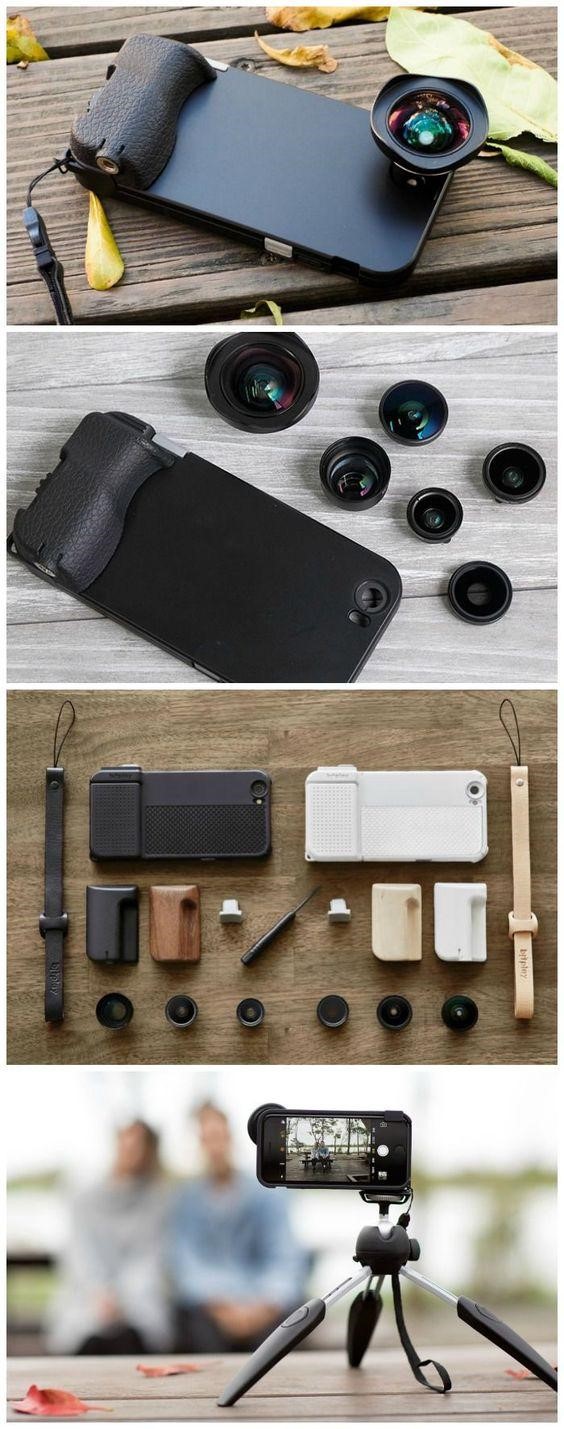
Photo: https://www.amazon.com
What is the secret of photographing?
Definitely the automatic mode is not a good choice. We have to learn how to control everything and set the camera to match the photographic conditions. Normally we select the manual mode (М) or priority of the aperture (Av). In many cases, portrait mode is also appropriate.
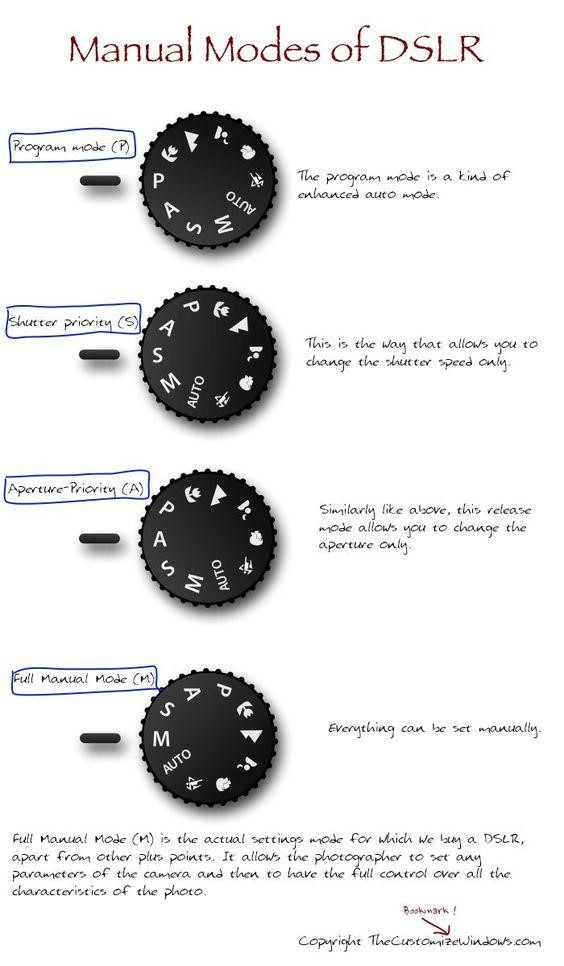
Photo :http://www.thecustomizewindows.com
The small number of the aperture provides more light. And to achieve this we need a slow shutter speed. This, in turn, raises the need of stability. The camera or smartphone must be placed and fixed on a solid surface. It is best to use a tripod.
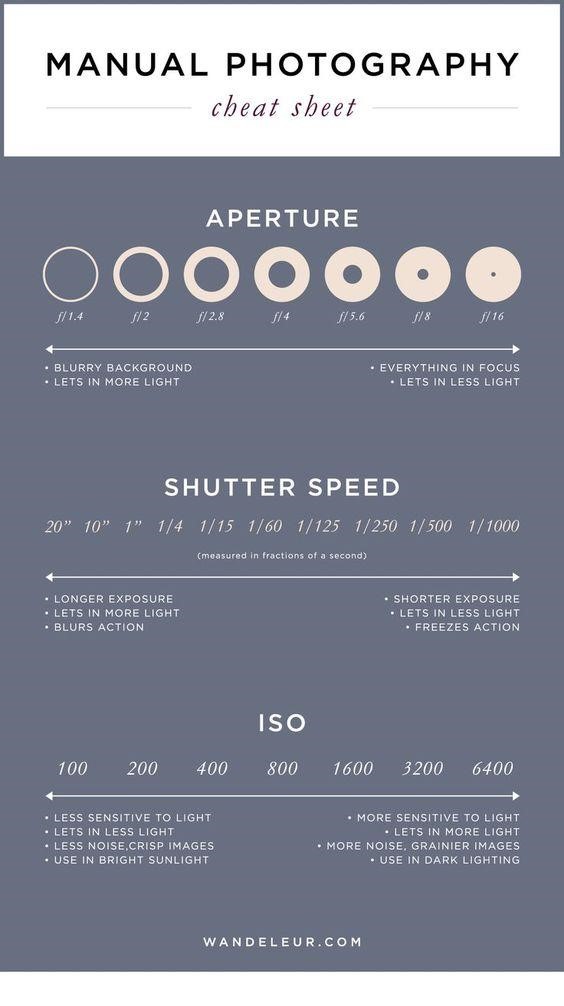
Photo : http://www.buytopdslrcameras.com
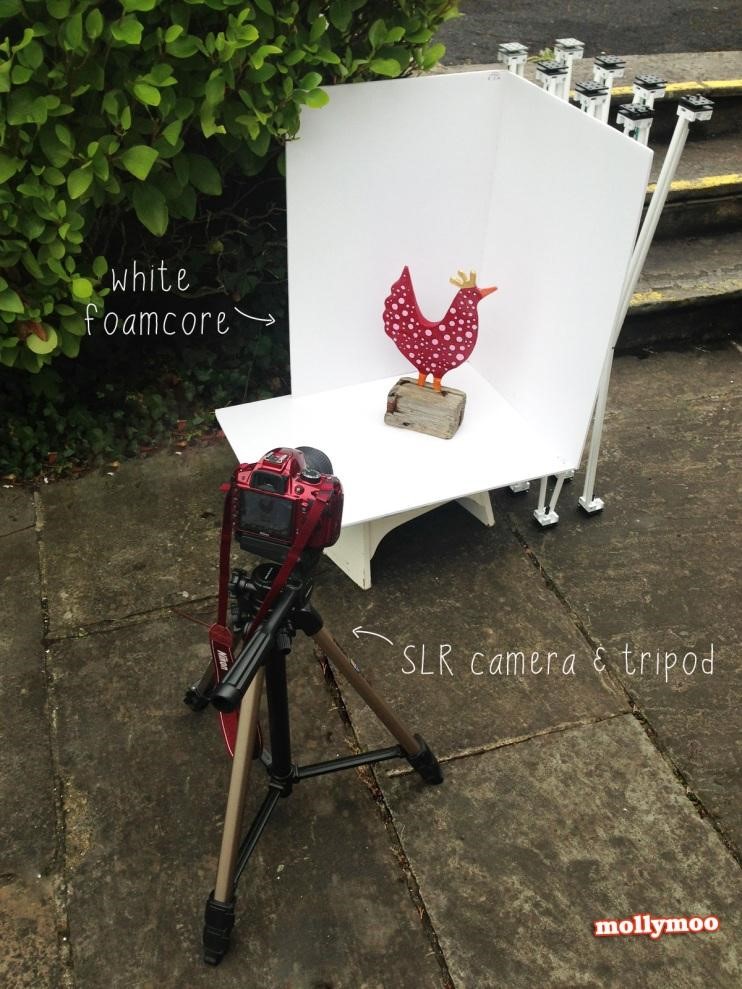
Photo http://mollymoocrafts.com/
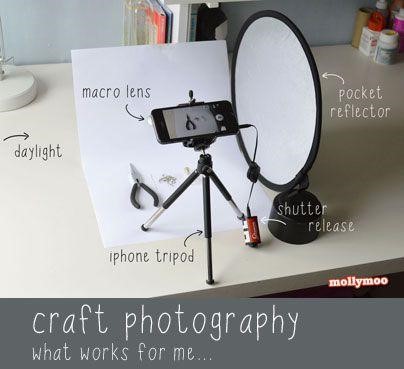
Photo http://mollymoocrafts.com/
Lenses differ in range, maximum aperture and sharpness.
The general rule in product photography is to avoid wide-angle lenses because they can lead to aberrations (distortion of the object).
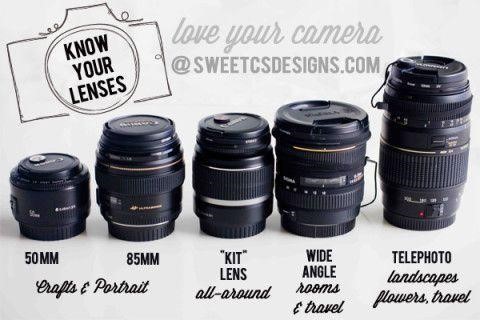
Photo http://www.sweetcsdesigns.com
It is preferable to use standard lenses with a focal length of 40 mm to 60 mm. More versatility offer the vario-lenses 24 -70 mm. They would give a sense of reality to the image. The macro lenses are also suitable for the purpose. They can highlight certain elements and details.
For product photography are suitable lenses with fixed focal length or solid lens f/ 1.4, f/ 1.8. They provide a shallower depth of the field and a slight blurring (defocus) of the background. When photographing products and objects, the aperture diapason is considered to be best in the range between f/ 8 to f /16. Greatest depth is achieved focusing on the object and sharpness of the frame.
The use of digital zoom is not recommended because the quality of the image deteriorates.
To get high-quality images, you need to adjust light-sensitivity of your camera or the so-called ISO.
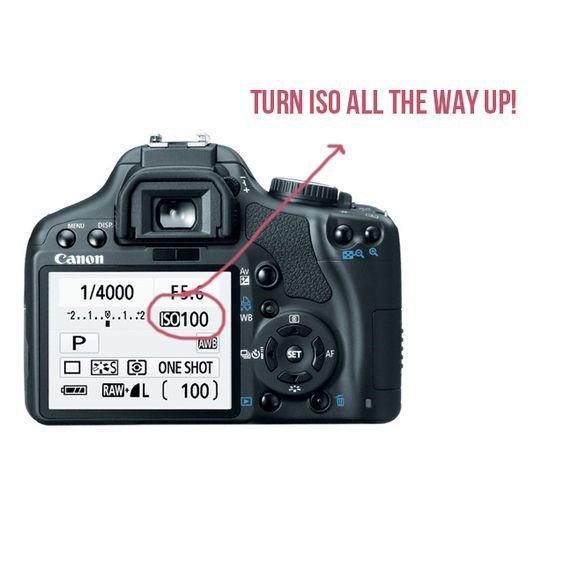
This is usually automatic in smartphones, but they can also be adjusted manually.
It is good to use low sensitivity in very light and vice versa, high sensitivity when it is darker. Typically, ISO 100, ISO 200 are used in product photography.
The human eye has a wide range of light adaptation, but the cameras have not reached such aspects. Here comes the next setting – to adjust the proper white balance (WB) in order to get specific and accurate colors. This is a setting that is automatic and matches the colors of different sources of light, such as daylight, in cloudy weather, in artificial lighting or fluorescent lighting.
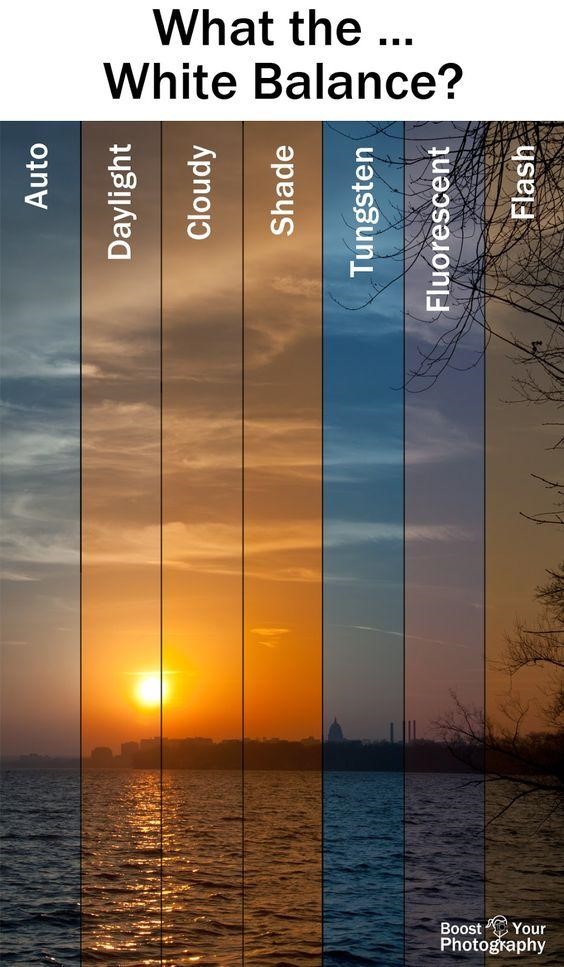
Photo http://www.boostyourphotography.com
For the needs of product photography, it is better to adjust the white balance manually. If you skip this setting, there is a great chance to get a color mismatch that would not have a good effect on the presentation and realization of your product.
And although subsequent processing makes it possible to use additional filters and other tools to correct this flaw, it is a good idea to adjust the white balance at first for better recognition of your product.
Find a way to make your photos special and the product more effective. Use an interesting filter, something in front of the lens, add movement, elements in foreground or create interesting light tricks.
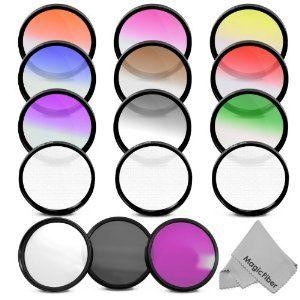
Photo http://www.amazon.com
Remember that including images, especially in lifestyle photography, is extremely useful for redirecting your product to social networking publications.
Last but not least, in what format do you record your photos?
The most popular photo format is JPEG. Practically it is easy to use, but limiting the flexibility in subsequent processing. If the camera allows, choose the RAW format. This is the original untreated version of the frame without any compressions. It allows for a finer and qualitative processing that will certainly improve the end result.
To optimize the photos after the session, you have to do retouching – editing.
The photos are edited with the appropriate software. It is used to eliminate and correct flaws, to enhance colors and contrast, add additional filters, and provides sharpness of the images, etc.
Such software, for examlle, is:
Snapseed – mobile application
Editing photos may be unsuccessful, especially if you do not have experience.
Using programs and processes such as Photoshop Actions, will allow you to make certain processing steps with just one click, which will save you time and errors.
