Why do you need a perfect product photo?
Product image helps consumer perception and is a key factor in e-commerce that you should not underestimate.
If you have an online store or intend to sell through various digital channels, you should be aware that the perfect photo of a product represents its value and provoke to sale.
In order to increase your sales percentage you will need product images that attract attention and are convincing.
What are the most important components to get the perfect product photo?
When it comes to product photography, always plan the whole process well and don’t be afraid to invest time.
The first step to the perfect product photo is preparation. For the needs of the marketing process it is necessary to know the product in detail, to classify its strengths and advantages , which will help you build a realistic action plan. You will be clear on what is needed to highlight the details and which features to give the most importance .
Set Background
The product should always be in the focus of your image. The background color and complementary elements must be chosen so as not to distract from the main product. Therefore, if you want to show off your products with the least distractions, white background is the best way to do it.
To capture a pure white background, RGB (255,255,255) will need to handle the settings of your camera (shutter speed, aperture, ISO, focal length, white balance) , refine the lighting settings and process the photo afterwards.
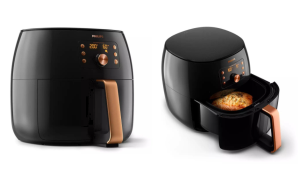
Achieve perfect lighting
Record the location and distance of any light that illuminates your product. Decide which shades will be appropriate and which will be superfluous. You need even distribution of light around the product. Use at least two lamps.
If necessary add diffusers to scatter and direct light. Adjust the color temperature with the white balance from the settings of your camera so that there is neither blue nor yellow. Whether you prefer lightbox or controlled lighting strive to avoid possible flaws with contrast at the edges of the product.

Once you’ve achieved the right settings, you can get consistent, professional results and recreate them for all your photos.
Determine the most appropriate shooting angles
As a rule, in product photography shooting angles are determined depending on the philosophy of the product. The aim of the appropriate points of view is to present the most positive features and highlight the strengths of the product.
For the best feel you need to create a depth that will give a three-dimensional effect and will make the product look alive. It is important to consider the distance between the camera and your product.
The main points of view are:
- Low position – photos are taken from a position below the subject. Thus, the product occupies a dominant position. This type of visualization is the best Suitable for contextual photos and lifestyle shots.
- Eye level location – photos are taken frontally. They are widely used in online stores and e-commerce in general.
- High Position – photos are taken from the raised position of the camera, which looks down at the subject. They usually have a supporting role or are needed to reveal additional benefits.
When planning the perfect product photo consider effective angles that will add perspective to your product.

jimmy choo
& nbsp;
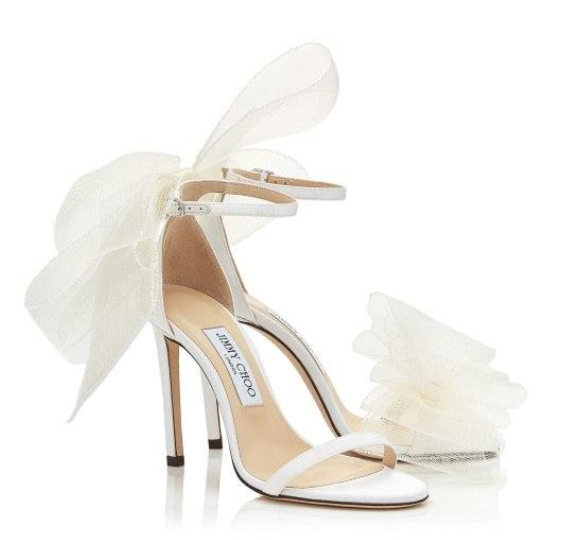
The front corner almost always refers to the image, which is basic and aims to inform buyers, showing the main features of the product . And since this is the first shot that potential users will see, the front corner should be really enticing, while providing enough detail.
jimmy choo
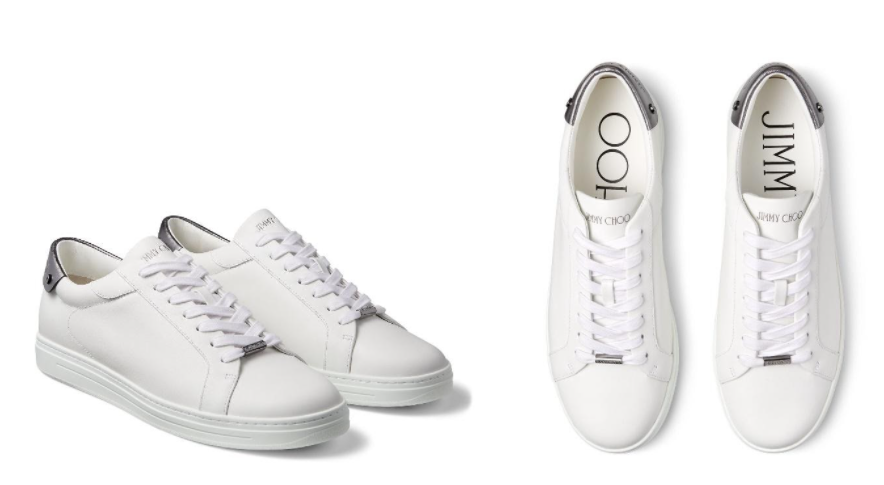
Product photography is a creative process. Here, for example, a pair of men’s shoes, which at first glance are quite ordinary. But a different front shot makes them special and different.
jimmy choo
They were shot frontally, but their position relative to the camera was vertical. The aim here is to emphasize the brand and the characteristics that the frame on the left cannot reflect.
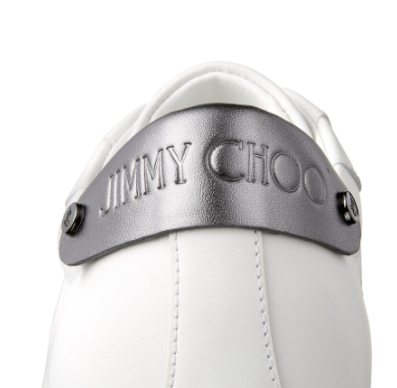
The back corner is usually inserted into a supporting frame. Of course, this depends on the individuality of the product and its details. We go back to that pair of men’s shoes.
It needs, even a mandatory frame from the back corner to visualize another of its features and distinguish it from the ordinary appearance we encounter in the first place.
jimmy choo
The 45-degree angle , also known as the three-quarter angle, is more widely used in food photography, but always can also be useful for highlighting important product elements. One such frame will show many aspects of the product, while providing additional details.
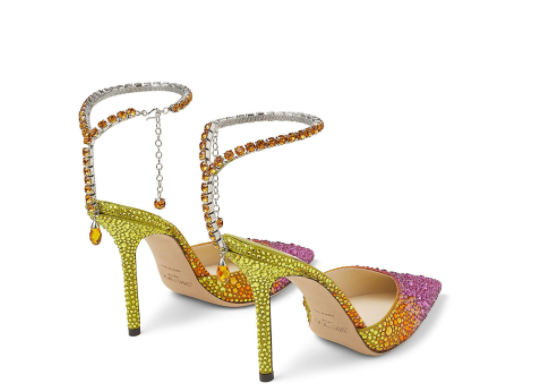
jimmy choo
The top corner is called bird’s eye view or top view. Its role is rather contextual to the potential consumer and again depends on the nature of the product. And yet, while we’re talking about shoes, here’s what they would look like from that position.

This type of product image is widely popular on social networks, especially Instagram and Pinterest. The potential buyer identifies more easily with the product and makes a faster purchase decision.
Image Optimization
Product image optimization in e-commerce is a factor for more sales. When it comes to browsing products, customers love the inexhaustible possibilities for detailed product demonstrations.
And if you want to improve your conversion rate, customer engagement, customer loyalty and brand value, you can start by adding to your e-shop or website image scaling function.
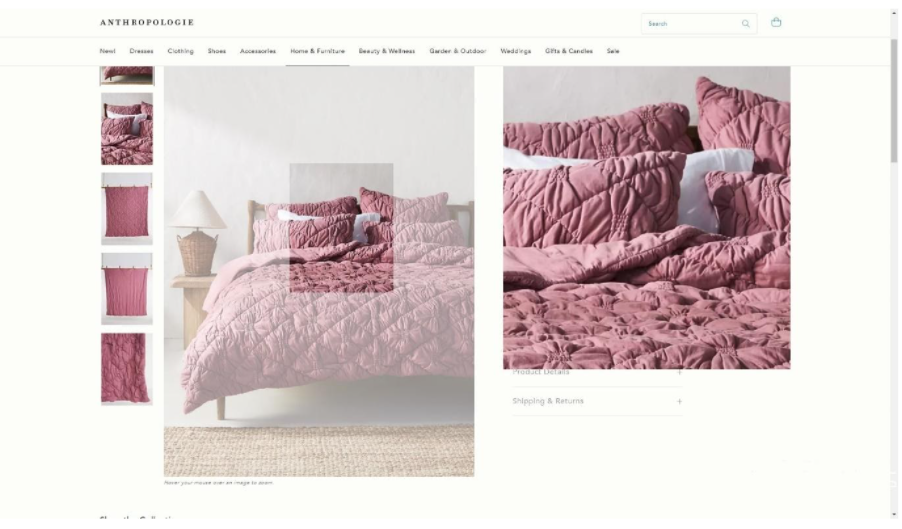
Whether users click, hold the cursor, or use a separate zoom icon, zooming means a better experience , which is appreciated by customers.
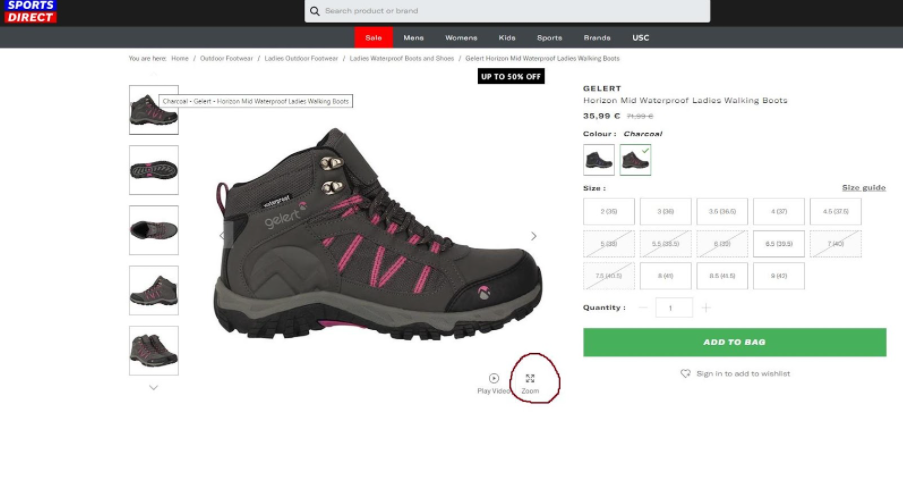

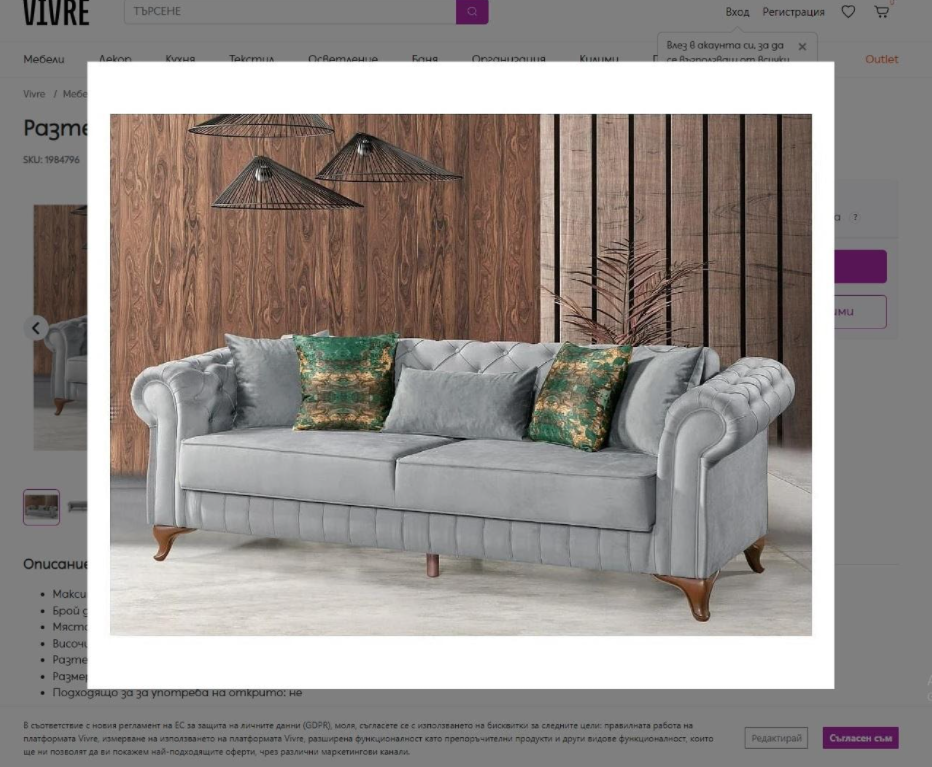
Proximity is usually perceived by consumers as a guarantee of quality. Our advice is to avoid auto-zoom and allow users to choose when to take advantage of this feature.
Automated post-production for sequential photos
Post-image processing is a key moment in the process of capturing the perfect product photo . Automatic post-processing for all images is usually applied to achieve consistency in product pages.
A set of standard, preset settings based on your post-processing experience can be embedded in both the camera and editing software you are not shooting in RAW format.
For product photography batch editing is most applicable to settings such as white balance, sharpness adjustments and noise reduction, which must be constant throughout the work process.
But basic color adjustments are better done manually. The product must be presented realistically, no matter how or where it was shot.
Of course, today there are automated software and hardware solutions to remove the background, which are especially suitable for those businesses with many and varied items.
There are different batch photo editors, such as BatchPhoto, ACDSee Photo Studio, Pixc which differ in features, price and reliability, but certainly save time and effort.