The rapid development of digital technologies and their widespread popularization require our online presence to be more persistent, whether as traders or as regular consumers.
And maybe you are creating? And maybe you have something to present to others? Handmade jewelery, items, souvenirs? Or you knit, decorate objects, draw glass, or you manage a culinary blog? Or are you an entrepreneur who is just starting their business online?
Do you currently have a budget that will allow you to take advantage of the skills of a professional photographer or the services of an advertising agency? Most likely, such a perspective raises a number of questions and a more specific one “Can you make product photography at home?”
To calm you down, in the following lines we will introduce you to the appropriate equipment and specific techniques. We will give you guidelines and recommendations to help you do it yourself.
The first and main thing to keep in mind is that the images of the products are the way you connect with your potential users. That’s why you should not underestimate the quality of the photos you will make.
NECESSARY EQUIPMENT
Camera/photographic camera
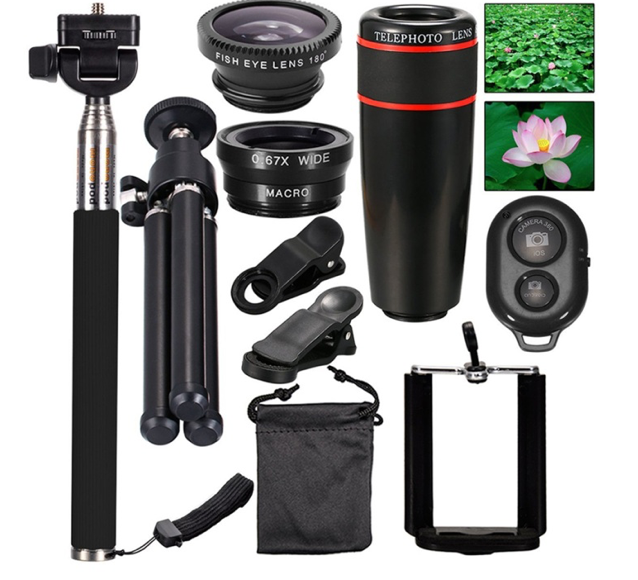
To capture perfect product frames, you’ll need a DSLR camera with over 12 MPs or a relatively new smartphone to take pictures of high enough resolution. Recently, in this regard, the market offers extremely popular phone accessories such as a set of lenses, filters, additional led lights, remote controls, various stands, and so on.
Recommendation: If you can not buy a higher-resolution camera or smartphone, do not rush and start with something you already have. Practice and make a gradual progress
Suitable lens
Depending on the particular object you are shooting, a key point is the choice of a suitable lens. The so-called hard lenses are preferred to capture objects in product photography. These are those lenses with fixed focal length. Usually with the option of reaching a large opening of the aperture, which allows enough light to enter, and the image itself gets the necessary depth of sharpness.
Next in the list, last but not least, are the macro lenses, the advantage of which is the possibility to get the most out of the object and to highlight specific details of it.
Recommendation: Before you get a photographic equipment, consider which would be the most appropriate lens for capturing your products. Start with it, then make improvements.
Tripod
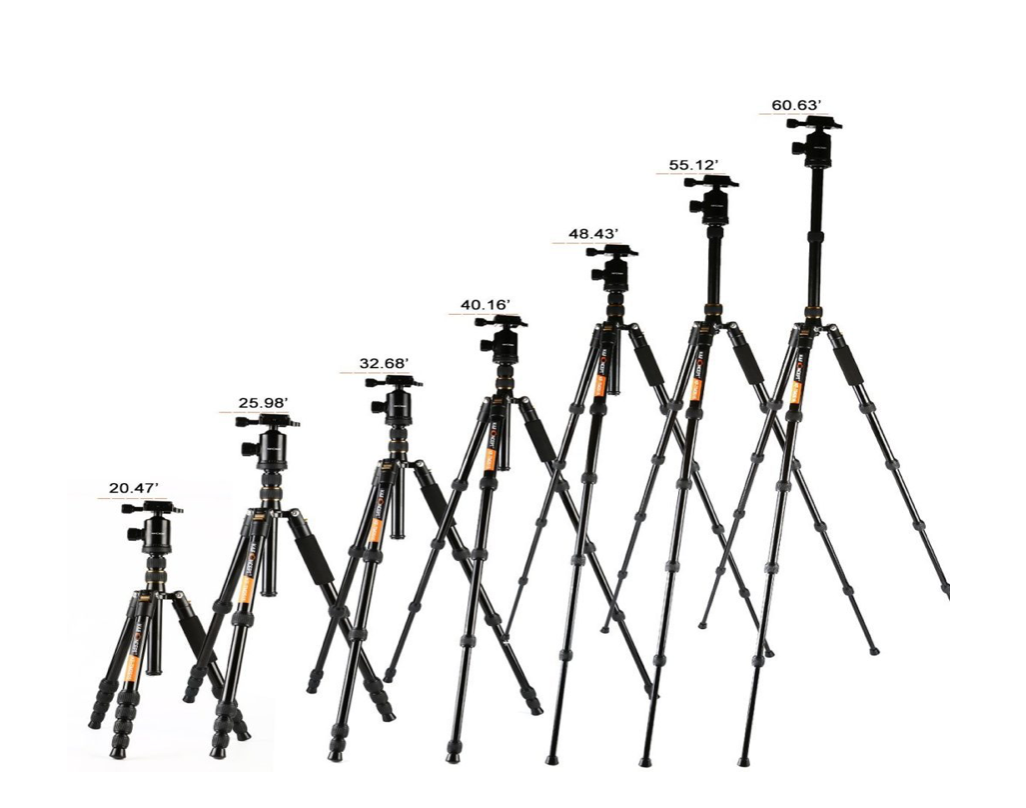
Another part of the equipment you should not forget is a stand or a tripod with which to fix the camera if you want to get a shot in focus. It would not be nice to look at a blurry/defocused object, right?
If the tripod is too expensive for you, you can always improvise by providing stability by positioning the camera on a hard surface. Make sure you do not shake when shooting.
Recommendation: Set the camera to self-shutter (10 seconds), so avoid any movement when you press the button for the filming.
Light
When choosing a light, you have two options:
Use natural, indirect, daylight or artificial, including additional lighting devices. Most experts recommend natural light, but in order to avoid surprises, especially with regard to color, it is good to provide a reflector that can be purchased, or to encourage your imagination with ideas and specific items that are available to you and would replace the function of the original reflector without any problems.
Recommendation: Make sure the light is sufficient. It should not be direct. If you are concerned that the amount of light is too much, you may obscure part of the window with a blind, a piece of paper or cloth. We add one important clarification – using a built-in flash is not desirable.
If the product you are shooting is small, it is best to take advantage of the functionalities offered by the tent for product photography. Through it the light spreads evenly around the object. It comes in a set with with adjustable led lighting.
If you have sufficient budget, you can afford professional lighting. Buy a suitable set of flashes, photo lamps, diffusers, and any accessories available in specialized stores.
Ways to shoot
Organize an appropriate spot to be your studio. Think carefully about the idea you want to present your product with. Select and combine appropriate backgrounds.
E-commerce and online stores typically use a white background that sheds light on the object and prevents distraction. At home, a white background can be a wall, a suitable piece of furniture or a piece of white cardboard.
If you want to excite people, combine colors and shapes
The technique, which would reflect the functionalities of the product, its practical application in everyday life, is known as lifestyle photography or ь photograph in the context. Images usually tell a story. A beautiful presentation has the ability to ейъсше the imagination. A certain prerequisite for building trust between your product and the potential consumer.
You want to focus on a specific detail
You will then apply a close-up or detailed shot. This is especially important if the item is handmade. Here, you are directing the attention of the users to a specific feature. Where you put special attention to detail. The details will distinguish your work and style. Use detailed capture to highlight the rest
To build a specific idea, it is advisable to make large-scale pictures.
In this case, you have the opportunity to be creative and to combine the product with a suitable object to give the viewer the impression of the actual size of your product.
To be happy with the results at the end, provide plenty of photos to visualize your products in an attractive way. To do this, take pictures from different angles, show close-ups of individual details, textures or something special that is worth accentuating.
As you may have noticed, the most popular at the moment, especially on social networks, are the photos taken from above.
Technique of capturing

A mandatory condition when capturing products is to get used to manual adjustment mode. It is usually marked with the symbol M (manual). This will give you more control and the ability to achieve perfect results.
In manual mode, you will set the settings yourself:
Aperture (F-Stop)
- Shutter speed (Shutter Speed)
- Light sensitivity (ISO)
- Balance of white (WB)
Typically, a smaller opening of the aperture (a larger number) is used in product photography, so the image can be as sharp and focused as possible.
A slow shutter speed allows more light to enter through the lens. In this situation, you will surely need a tripod, but you will be able to provide stability as well as a long enough time to respond to the shutter without risking any blurring of the frame. ISO is especially useful for low light settings when the aperture may not provide a sufficiently clear image.
White balance is important to ensure that the colors in the image are correctly presented or as realistic as possible. If you miss to set the white, there will surely be some discrepancy. And although post-processing allows you to correct this problem, it’s best to build a habit, to adjust this setting at the beginning of the photos.
The final stage in product photography is the processing of the frames and their publication. Find the most suitable programs or apps for you to work with and get the best results.
The processing is to give a finished look to your product. The main areas of work are: correction of color balance, contrast. Removing imperfect shots, if any.
For your convenience, we would advise you to explore the options for the application of ready filters or Actions in the processing programs that are specially designed to help you, allowing you to play certain processing steps with just one click, much faster than do them manually. To make processing easier, always shoot in RAW format or at the highest resolution possible.
If your photos are designed for ready electronic platforms such as Etsy, Amazon, eBay, Shopify, you should know that they have specific requirements for how to capture the products and how they are presented. Of course, the teams have been smart enough to provide sufficient and useful information, guides and everything to help you realize your intentions.
Do not be afraid to try different techniques and to present your own views. Some of the most famous product photographers have become successful with experiments and because did not give up.