Imagine being in a restaurant and opening the menu.
You are reading the content, but a photo of a perfectly baked steak, garnished with colorful vegetables, covered with an abundant sauce, does not stop attracting your attention. Admit it! No matter how much you read the contents of the menu, that appetizing photo does not go away from your thoughts. In the end, you order that juicy steak.
This is the superpower of a photo in product photography. To charm you right away. Make you choose. And when it comes to an impressive snapshot of food, its effect is to awaken your appetite and make you hungry.
Product photography evolves along with technology. Food images are becoming more and more relevant, whether for marketing purposes or for fun.
Culinary photography takes on an increasing share of online space. For their advertising, many restaurants rely on social networks. Their menus also go digital. Consumers have the opportunity to view them from their mobile devices, laptops and computers. We also see them food service platforms in which we can order food for home. Food and drink images fill the pages of culinary magazines, cookbooks, weekly brochures of many food chains.
But behind a truly delicious photo stands a photographer whose goal is to make you salivate. This is accomplished with a lot of work, specific equipment, the choice of appropriate light, a shooting technique and creativity.
The photos are planned before the shooting process begins.
First should be considered the composition, the angles from which will be best to capture the object, the background color, the surface, and the composition of the optional arrangement, if any.
An attractive image of food should make sense, it has to be consistent, as well as tell a story. Brave professionals experiment with dramatic images, use bold backgrounds, allow themselves to present frames with half-eaten food.
Inspiring pictures are not accidental. It is important to know what we want to emphasize.
What are the rules that create a balanced frame in culinary photography?
When it comes to food styling, light is a key factor for attractive images. Preferably, natural, indirect daylight. Forget about the built-in flash of the camera. Otherwise expect reflections.
The light should be directed and illuminate the food on the side. It is good to have a additional light behind the food. The side light makes the frame look natural. It creates shadows, gives real colors and depth of the image.
Composition plays a key role in the creation of exciting frames.
What is the composition? Arangement of individual items or objects according to their geometric proportions, tailored to the perspective. Accompanied by colors, backgrounds and way of illumination. Everything is one thing.
Color in food plays a huge role in visual perception, emotion and human response. Colors create a mood. Through then we can make specific focuses and messages. Colors and textures should go hand in hand to attract. Beautiful pictures of food recreate harmony. Therefore, when choosing an arrangement (dishes, cutlery, napkins), the fantasy focuses on the background color, the color of the dish, the individual ingredients.
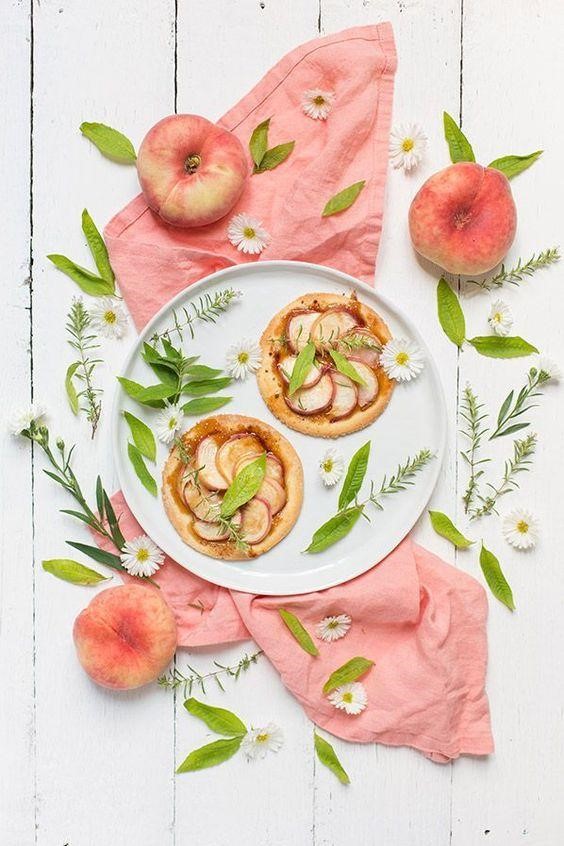
Photo: http://www.carnetsparisiens.com
Divine proportions are a symbol of beauty, harmony and perfection in nature. They are widely used in painting, science and photography.
For balanced compositions, the rule of thirds is applied in practice.
A technique for attracting attention to the natural field of vision of a person. To the place where he will look first. What is the rule of thirds? The frame – the mental space is divided into nine equal parts with two horizontal and two vertical lines. The object is positioned in one of the four intersection zones formed between the straight lines.
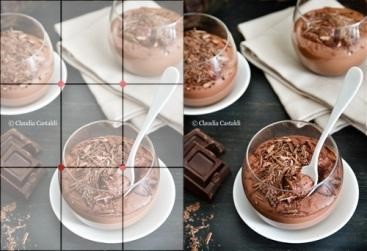
Photo:claudiacastaldi.com
In food images, the rule of thirds is generally applied for shooting burgers, sandwiches, or more generally for multi-layered food and height viewed from one side.
Other leading techniques of composition applied in food frames are the golden section, the golden triangle and the Fibonacci spiral.
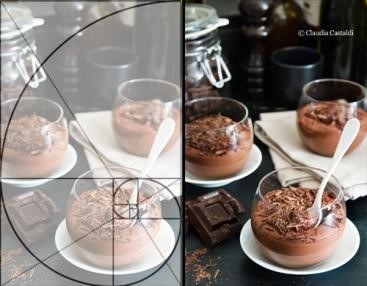
Photo: claudiacastaldi.com
Choosing the right perspective
In culinary photography, the best pictures always tell a story and are in some sequence. Professionals recommend shooting from different angles. For greater diversity, it would be good to combine them and experiment.
By choosing the angle of capture, a sense of depth, perspective and scale is created.
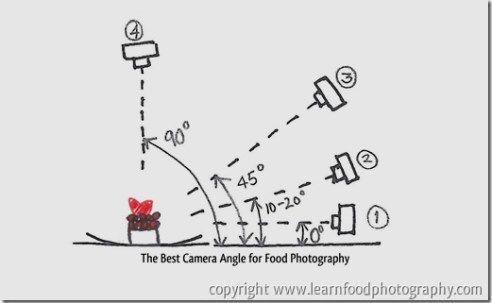
Depending on the type of the object, its height and location we can distinguish several major shooting angles.
Many photographers choose between a bird’s eye view (top-down shooting) and a 45 degree angle. The side angles can be applied to capture multilayer food.
A popular format for Instagram and many of the culinary blogs is a 90 ° or bird’s eye view. The composition in this case is easiest because no depth of the frame is needed.
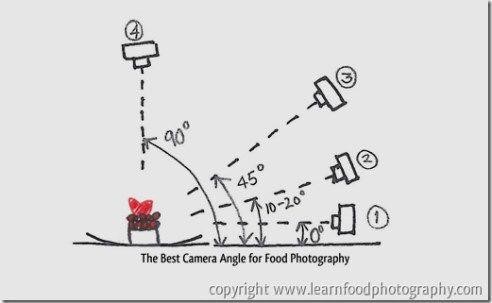
Photo: http://www.fotogrammidizucchero.com
The 45-degree angle of shooting is one of the most popular and commonly used in food photography. Through this angle, food is captured in a close-up. You can trace its surface while the background is almost missing.
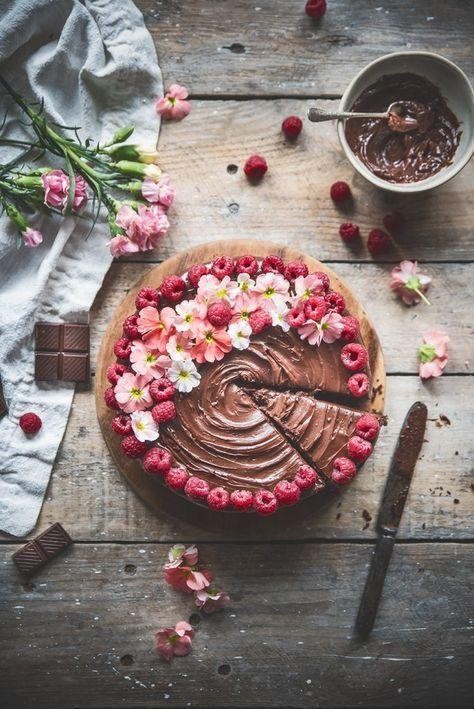
Photo:httpseasyandhealthyrecipes.com
At 30 ° we get something similar, but the difference is that a background is added. One trick to get a perfect frame shot at 30 ° is the plate (dish) where the food is located to be shallow to capture the object in focus and deepen it on its surface.
Frontal shot or at 0 ° allows you to capture more details in a higher pale – such as a burger, pancakes arranged on top of each other, biscuits, a piece of cake.
Using this angle, you demonstrate different layers of food, its content.
To get the most attention and distinguish each individual layer, you can use a trick applied by photographer Nikolay Shishkov, also known as Nickola_Che.
If I shoot a burger, in order to split the layers and make them look different, sometimes I just put a coin or a small pile of coins among them, depending on the height I need.“.
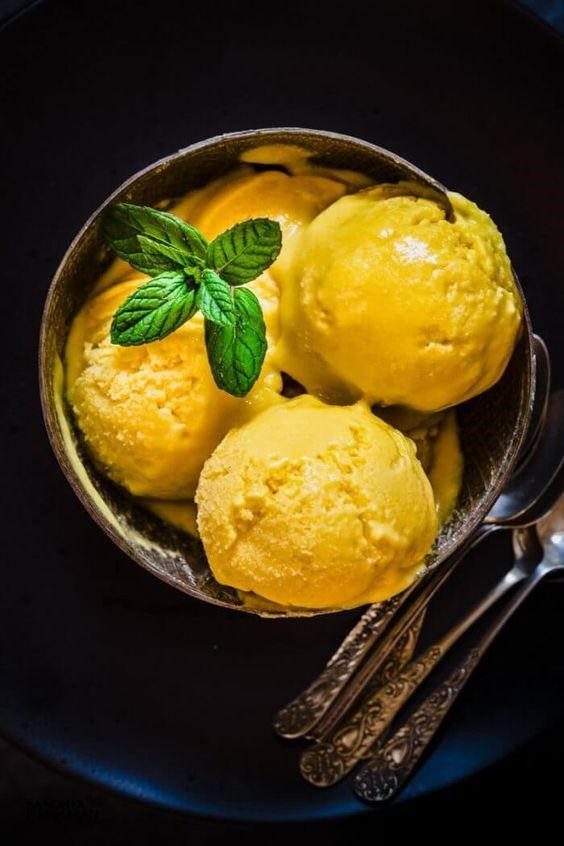
Photo: http://temptationforfood.com/
Different lenses are also suitable for shooting from different angles. For a well-selected set of lenses, be sure to include a 100mm macro lens – one of the most recommended in product photography for foods. With it, you will achieve a defocused (blurred) background that is favored in this photo style.
If we look at images of famous culinary photographers, we will notice a 50 mm focal length lens with a fixed aperture (f / 1.2, f / 1.4, f / 1.8). Their inventory includes lenses 24-70mm, 24-105mm.
Regarding the suitable camera for food images, the established culinary bloggers, authors at different culinary sites say they started with low-budget cameras. They have gone through many updates and upgrades. Together with professional photographers, they all share the view that in order to achieve a high-quality product picture without a lack of detail, a higher class camera such as DSLR full frame is needed. Of course, for photos intended for social networks such as Instagram, Pinterest, Facebook a good smartphone is enough.
Camera settings for food images generally do not differ from standard in product photography.
The most suitable shooting mode is manual – it allows full aperture control and shutter speed. It is important maximum amount of light to enter through the lens. The object must be sharp and focused. Be sure to set the appropriate light sensitivity (ISO). Setting a correct white balance will provide you with accurate and realistic colors. And in order to avoid defocused and blurry images, use a tripod if possible.
After shooting, the frames need to be edited. This is achieved with the suitable software. Removing flaws, balancing colors. In case you shoot on the RAW format you will have more freedom to create an attractive, end frame with high enough resolution.
