
From a hobby of many chefs and bakers, the culinary blogs and YouTube channels have become business. Gradually, people began to develop interest in food.
For many of us, social networks and Internet are part of our everyday lives, as well as sources from which we get information. We follow rubrics, as well as famous chefs, we view, share and inspire ourselves by the abundance of cooking recipes.
In addition, the interactive space is filled with numerous images of colorful cakes, golden breads, fluffy cookies, delicate pastries, interesting ingredients, scattered flour, sprinkled powdered sugar, lots of chocolate and plates with delicious pieces of cakes.
Pictures that provoke the imagination of every customer.
These pictures seem so real that the viewer is able almost to taste the dish.
To attract followers, achieve orders, make advertisement, all those authors of culinary blogs, YouTube channels and social networks and owners of bakeries, photograph their recipes and culinary masterpieces, and seduce us every time with more attractive and creative images.
Baking in turn has much to do with photography. Both are based on precise and specific technology in their own process. As the baker follows his recipe, using specific ingredients and methods, the culinary photography follows its stages for which a suitable technique is needed.
The end result of both is a masterpiece of the senses.
The main ingredients for achieving such a triumph in culinary photography are properly selected lighting and interesting composition. Playing with light is of key importance. Through it we can place the focus on the original goal of the frame.
The professionals and experts recommend the following approach. The light should come from the side. This will reduce the brighter sections that would „burn“if they are illuminated with more light. The side lighting gives the necessary contrast and volume of the photo. It is good to have a diffuser placed against the light source. Thus, the flow of light will be softer and will spread evenly. If necessary, a backlight can be used to highlight the texture.
According to the specialists, the natural, soft, scattered light is most favorable to capture food.
In order the frame of a delicious baked dish to be impressive, we need a scene full of harmony with appropriate colors, ingredients, arrangements and backgrounds. A composition to demonstrate an expected taste. The photos of baked dishes often tell a story, starting with the necessary products, going through the preparation process, and reaching the end.
The background, colors and surface will affect the overall mood you want to give through the picture.
Let‘s take as an example a pumpkin pie. The most appropriate scene would be a well arranged autumn scene. The combination of ingredients and flavors of a pumpkin pie placed on a wooden surface, combined with the autumn colors will give to the image a sense of warmth and coziness.
Accentuating decoration with some of the products with which the baked dish is made – a pumpkin, cinnamon and walnuts will demonstrate also the expected taste.
The viewer will be able to feel the mood and the season.
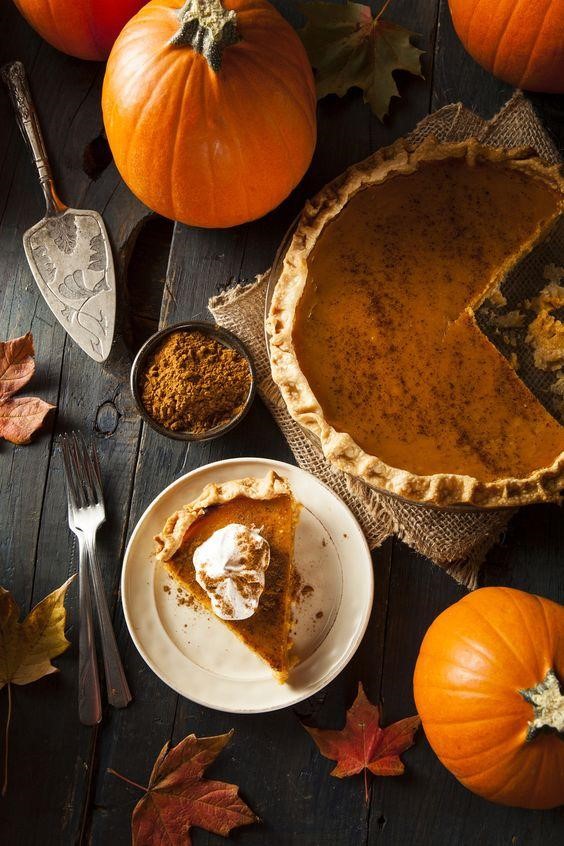
Photo: http://www.punchbowl.com
In order to create a dynamic frame that will excite the imagination, you will need well selected shooting angles, suitable colors and precise composition.
Symmetry and simplicity are preferred in product photography, but dynamic shots attract their audience.
To add dynamic to your photo, you should not be afraid to experiment with backgrounds and colors. Add some movement by sprinkling the baked dish with dry ingredient, pouring with caramel, chocolate or use scattered flour when kneading the dough.
Let your fantasy work.
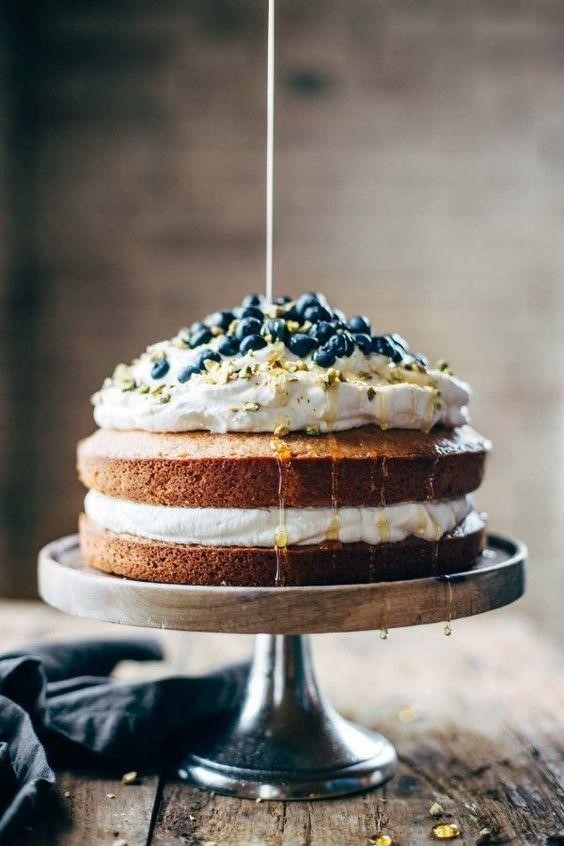
Photo: http://www.pinchofyum.com
How to choose your shooting angle?
The different types of baked dishes look good from different points of view. So for the best result, the first thing you can do is to determine the focus of your object.
If the baked dish is with thin or single layer, but with abundant decoration (pizza, single-layer cake or a pie) the most suitable shooting angle will be at 90°.
In other words, you will photograph the food from above.
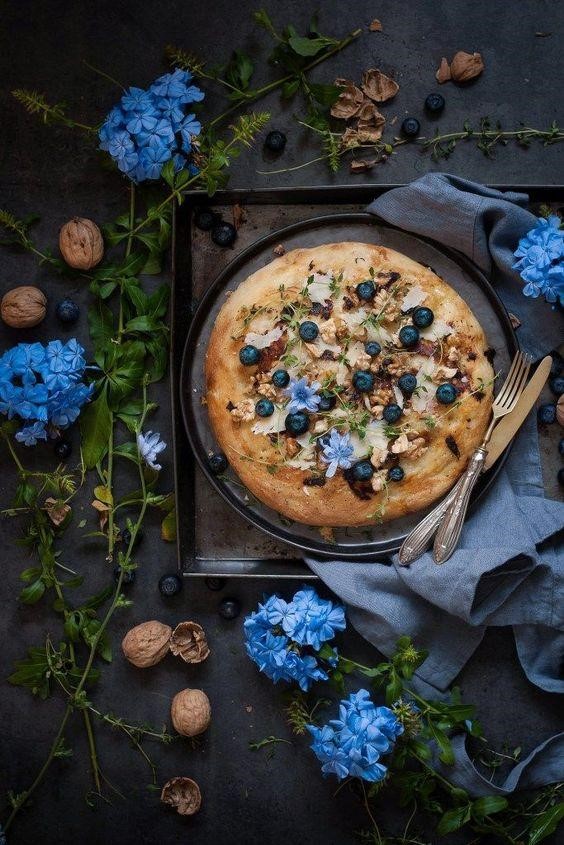
Photo:http://www.madameskitchen.it
Using this position you will include all details of the baked dish and the background, and you will be able to highlight the decoration – the shape of the tray, cutlery and other objects within the scene.
Multi-layered baked dishes or arranged on a pile (for example, biscuits) should be photographed frontally – 0°. In this way you will bring the height and the layers to the foreground.
This aspect is also useful when you want to show typical details of a piece of bread or cake. It is good to use a neutral background.
Photo: https://www.taste.com.au
For smaller baked dishes, such as cookies or individual pieces, it is recommended to capture them from above.
An angle of 45° is great and works well for most of the baked dishes. It highlights all surface characteristics and at the same time captures the object from the side. We see it in its three – dimensional shape.
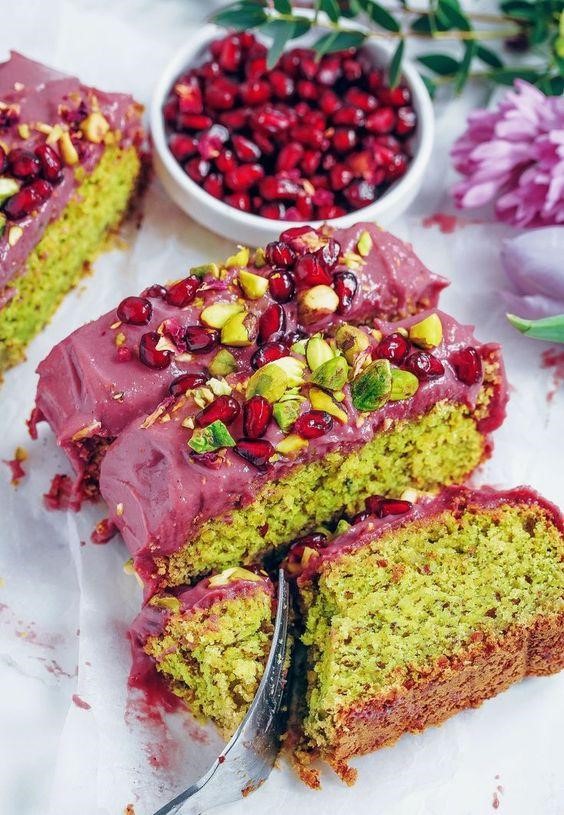
Photo: https://pawsandsoul.com
Apart from the abovementioned, it is important to know a person’s eyes naturally focus on certain crossing points on one surface.
In art this law is known as Rule of thirds. This technique of composition is widely used in all aspects of photography and is particularly popular when shooting baked dishes.
To attract interest, the magnificent photography of food also needs a great style.
The smallest details have the ability to make a single frame more dynamic. Using grouping of the main object with part of the ingredients with which it is prepared, will create an association. The ingredients that are on the background should be fresh, the fruits should be juicy and the flowers blossoming.
The dishes and pots in which we will present the baked dish are also very important:
– on a grill – recreating a moment of a baked dish that has just come out of the oven.
– in a tray – with a mission piece on a rotating stand..
Cotton cloths can add some color and texture to the image. White fabric is usually the most suitable, but bright colors can work well with a certain type of baked dishes.
Involving people or additional objects speaks of a story or associates with a specific moment.
Appropriate camera and settings.
When it comes to the suitable camera, it all depends on your abilities.
With experience gained over time, culinary bloggers have come to the conclusion, which is same as of the professionals, that the most suitable for capturing of food in general are the DSLR full frame cameras. Of course, we should not forget that the lens plays a significant role in this case. Again, the opinions match with regard to lenses with 50 mm and with 24 mm fixed focal length for detailed and sharp images.
In addition, almost every person who is devoted to culinary photography has a 100 mm macro lens.
Nowadays, a smartphone can do a good job, but this depends entirely on your specific goal.
The camera settings require you to be able to operate manual mode. This gives you total control.
Exposition is key to getting the perfect end result. It refers to the brightness of the image. The main problem of the exposition that occurs while photographing food is that white and pale backgrounds, creams, ingredients and so on, can look too bright, without visible details.
To balance light and details of the image we need to set the: Aperture (F-Stop)
Speed of the shutter (Shutter Speed)
Light-sensitivity (ISO)
Through the aperture, we control the amount of light that will pass through the lens. The more open the aperture (smaller number) the more light will pass through the lens. The object will be in focus and the background behind will be defocused. And vice versa, the more closed the aperture, the less light will pass.
And as we know light is a key factor by which we emphasize the idea of the image.
To get the desired details and sharpness we need to control the shutter speed.
It refers to how slowly or quickly the shutter opens and closes. Faster shutter speeds means that less light can come in, making our picture darker, and vice versa, the slower shutter speed will allow more light to come in. However, you may need a tripod to avoid trembling of the camera and blurring of the entire frame.
ISO is especially useful for low light settings, when the open aperture may not provide a sufficiently clear image.
When photographing food, you should avoid using high light-sensitivity values. This will make your images grainy.
After the whole process of forming an idea, combined with composition, style, technique and technology, the photos go into the last stage – editing.
Their processing give them the chance to look more detailed, sophisticated, with real colors and acquire a more professional and attractive look.